
Learn WebSocket - in 5 Min

Real-time features are no longer optional. Chat apps, live tracking, notifications, collaborative editors — all of them rely on WebSockets to push data instantly.
Yet, many engineers struggle with two things:
How do I actually build a WebSocket server?
How do I test it properly without writing a full frontend?
In this post, we’ll do both — build a WebSocket server from scratch and test it using Postman, step by step.
This guide is practical, beginner-friendly, and grounded in real-world backend engineering.
System Design Refresher :
Designing a Robust Distributed Logging System for Modern Applications
20 System Design Concepts Every Developer Should Know - Part - I
What Is a WebSocket (Quick Refresher)
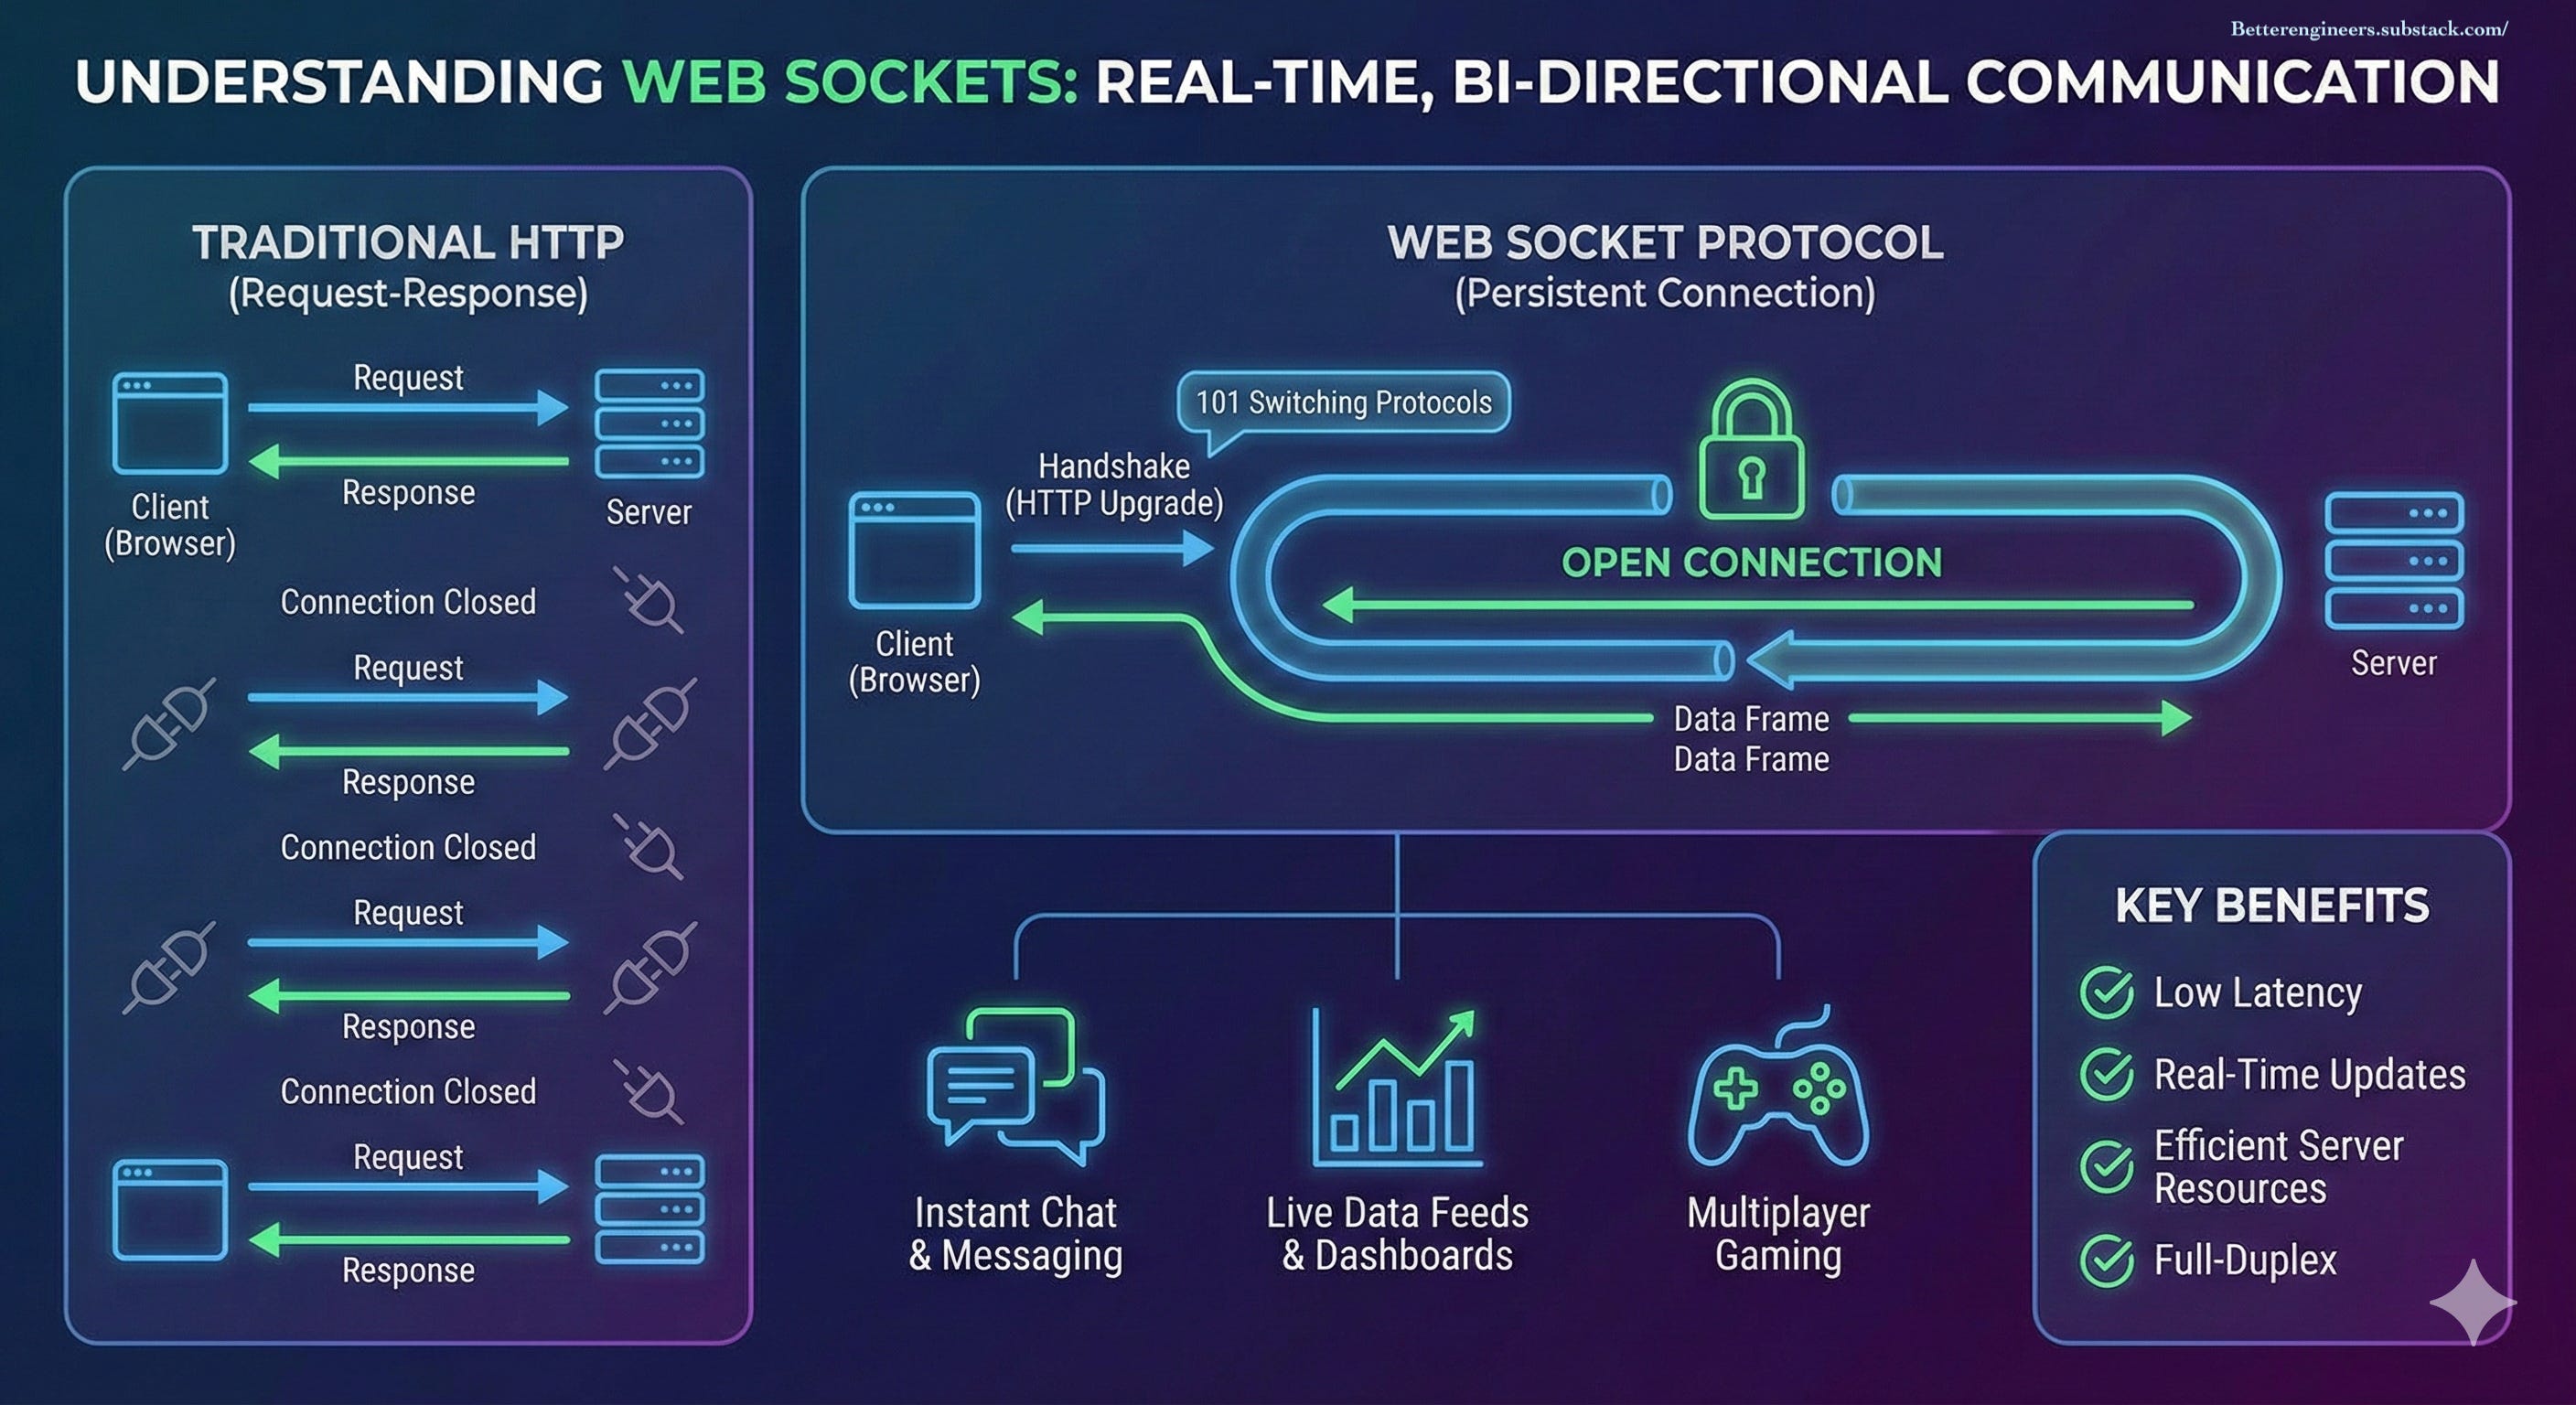
WebSocket is a protocol that provides:
A persistent connection between client and server
Bi-directional communication (server can push data anytime)
Much lower latency than HTTP polling
Once connected:
Client ⇄ WebSocket Connection ⇄ ServerThis makes WebSockets ideal for real-time systems.
Step 1: Setting Up a Simple WebSocket Server (Node.js)
We’ll use Node.js with the popular ws library.
1. Initialize the Project
mkdir websocket-demo
cd websocket-demo
npm init -y
2. Install WebSocket Dependency
npm install ws
Step 2: Writing the WebSocket Server
Create a file called server.js.
const WebSocket = require('ws');

const wss = new WebSocket.Server({ port: 8080 });

console.log('WebSocket server running on ws://localhost:8080');

wss.on('connection', (ws, req) => {
  console.log('Client connected');

  // Send welcome message
  ws.send(JSON.stringify({
    type: 'WELCOME',
    message: 'Connected to WebSocket server'
  }));

  ws.on('message', (data) => {
    const message = data.toString();
    console.log('Received:', message);

    // Echo message back
    ws.send(JSON.stringify({
      type: 'ECHO',
      message
    }));
  });

  ws.on('close', () => {
    console.log('Client disconnected');
  });
});
Start the server:
node server.js
Your WebSocket backend is now live.
Step 3: Why Use Postman for WebSocket Testing?
Traditionally, Postman was used only for REST APIs. Today, it supports WebSocket testing natively, which is incredibly useful for backend engineers.
Postman helps you:
Test WebSocket connections without a UI
Debug message formats
Validate authentication logic
Simulate multiple clients
Step 4: Connecting to WebSocket Using Postman
Open Postman
Click New → WebSocket Request
Enter the URL:
ws://localhost:8080
Click Connect
If the connection succeeds, you’ll immediately see the welcome message from the server.
Step 5: Sending Messages from Postman
In the message input box, send:
Hello WebSocket
The server responds with:
{
  "type": "ECHO",
  "message": "Hello WebSocket"
}
This confirms that:
The connection is active
Messages are flowing correctly
Server-side logic works
Step 6: Sending Structured JSON Messages
In real systems, WebSocket messages should always be structured.
Example message:
{
  "type": "CHAT_MESSAGE",
  "userId": "postman-user",
  "payload": {
    "text": "Hello from Postman"
  }
}
Update the server to parse JSON safely:
ws.on('message', (data) => {
  try {
    const msg = JSON.parse(data.toString());
    console.log('Received JSON:', msg);
  } catch (err) {
    console.log('Received text:', data.toString());
  }
});
This pattern scales far better than plain strings.
Step 7: Testing Broadcast (Multiple Clients)
Open multiple WebSocket requests in Postman and connect them to the same server.
Send a message from one client. If your server broadcasts messages, all connected clients will receive it.
This is crucial for testing:
Chat applications
Live dashboards
Notification systems
Step 8: Testing Authentication with Postman
Most production WebSocket systems require authentication.
Using Headers
Add this header in Postman before connecting:
Authorization: Bearer <JWT_TOKEN>
On the server:
wss.on('connection', (ws, req) => {
  const token = req.headers['authorization'];
  console.log('Auth header:', token);
});
Using Query Parameters
ws://localhost:8080?token=abc123
Both approaches are easy to validate using Postman.
Step 9: Heartbeats and Connection Health
WebSocket connections can silently die. A heartbeat mechanism helps detect dead clients.
setInterval(() => {
  wss.clients.forEach(ws => {
    if (ws.readyState === WebSocket.OPEN) {
      ws.ping();
    }
  });
}, 30000);
Postman automatically responds with pong, making it perfect for testing this logic.
Common Mistakes to Avoid
Treating WebSockets like REST APIs
Sending unstructured messages
Ignoring connection lifecycle
Not testing multiple clients
Postman helps catch these issues early.
Final Thoughts
Building WebSocket systems doesn’t have to be complicated.
With a minimal server and Postman as your testing tool, you can confidently develop, debug, and validate real-time features — long before a frontend exists.
If you’re building chat systems, live tracking, or event-driven platforms, this workflow will quickly become indispensable.
Coming next:
Scaling WebSockets with Redis Pub/Sub
Handling race conditions in real-time systems
WebSocket vs SSE vs gRPC streaming